
Farm Work


Irrigation
Although the central New York area is not severely dry, irrigation is still necessary in the heat of the summer, when there can be long dry spells, and at any time of year immediately following transplanting, when the transplants are tender and have not developed their full root structure. There are several options for irrigation, but the one that is currently in place is drip-tape irrigation. The drip tape system relies on plastic tubing that is connected to the spigot and runs down the main garden path. Thin plastic “tape” (actually tubing that is flat when not filled) is attached to this main tube, and runs down the beds. There are small holes in one side of the tape, which allow a steady drip through when the irrigation is running. The irrigation main-line tubing is attached to the southern spigot, and from there runs down one side of the main path, and then back up the other. The pieces are reused year after year, and are cut to size and numbered, starting with one at the spigot, and ending with eight back at the top of the path. The tape used in the beds is designed for one season of use, but if stored carefully, and patched occasionally with some care, it can last longer. However, there comes a time when it makes more sense to replace the tubing rather than add yet another patch.
To set up the drip tape irrigation system, begin by clamping together the pieces of the main tubing. There should be holes punched in this main tubing to which the tape will be attached. Each bed has two tapes, so there should be holes spaced two per bed. If there is not a hole in the main line where one is needed, use the blue-handled hole-puncher to punch one and if there is a hole where one is not needed, plug it using a ‘goof’ plug.
Stretch the tape out in the beds, looking for pieces that fit the length of the bed. There are two types of tape: one with holes every 4in, and one with holes every 12in. The 12in type is not as effective, as few crops are planted so far apart, and when they are it is impossible to line up the drips with the plants. Try to use mainly the tape with holes every 4in, and do not buy more 12in tape. If a piece is too long, or a new one must be cut, close off the end by folding it over several times and fitting a 2in section of tape over the end. Shorter pieces can be fit together using the yellow patch connectors. One piece of tape fits over each end of the yellow piece, and is held in place by tightening the plastic nut over the end of the tape.
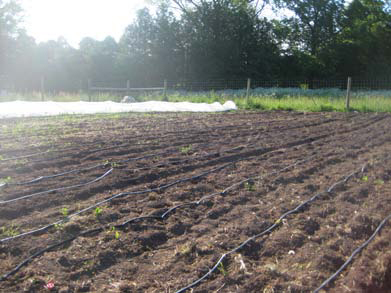
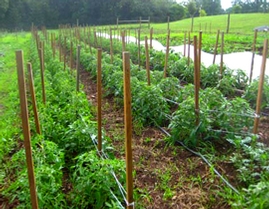
Drip Tape Laid Out in Beds
After tapes have been found for each bed, attach all of the tapes to the main line with the black and red adaptors. These adaptors fit into the holes in the main tubing, and the tape fits over the other end, and is clamped in place by tightening the plastic nut over the tape. Position the tape so the seam (where the holes are) is on the bottom. Once all of the tapes are connected, turn all of the tapes on by turning the red valves parallel to the beds, and then turn the whole system on at the spigot. Mark any leaks, and then turn the spigot off to patch them. To patch, cut the hole out with two cuts perpendicular to the lay of the tape, and then connect the two ends with the yellow connector patches. The system is now ready to be used.
It is best to irrigate in the morning and evenings, when the temperature is lower and less moisture will be lost due to evaporation. In addition, the water pressure is not high enough to water the whole garden at the same time, so it must be irrigated in sections. During the hottest periods of the summer, a good method is to irrigate the quadrants in rotation, watering a quadrant for an hour in the early morning, the next that evening, and so on. The irrigation should also be used to moisten the soil before planting, letting it run on the unplanted bed for about an hour, so that the soil is thoroughly dampened so the undeveloped roots of seedlings, or the ungerminated seeds will have adequate water. Be sure the tapes are positioned in between the row of plants so it is not impeding the plants’ growth and the water reaches the roots of all the plants.
Store the drip tape rolled on its spools so it is easy to unwind for the next season, and mice do not chew it. If used carefully, and stored properly, the drip tape should last for at least two seasons.